As promised....here is power sorting....Anna style!!! Everytime I go to a crop or especially a retreat, I go through this process of power sorting all my photos. I have a lot of stuff.... A LOT!!! And there is no way I can bring all my things with me to a retreat! So, I power sort! It totally allows me to get more done at crops and retreats and anything I don't finish, I can work on at home and it is already sorted and ready to go for me! I found out about power sorting through Creative Memories. They sell a box with files that you can use to sort your layouts for a book. You can use any box though and anything for files. In fact....for this retreat, I have 3 boxes that have sorted layouts. I don't have enough files, so I used old cardboard that comes with pages and paper books.

Here is the Creative Memories box. It works well, but can only hold about 15 layouts with embellishments. I really like it though, keeps everything in place really well.

This is the inside and the files. They are just simple white files. They are tabbed, not sure why. I never use the tabs. I'm sure there is a reason though. If you are using this box, you have to use the files. I tried the cardboard and it is a little too big to fit in the box. Just a thought.

This is another box that I use to put my layouts in. I got it at Hobby Lobby. It fits the cardboard great! And can fit like 20 layouts with embellishments.

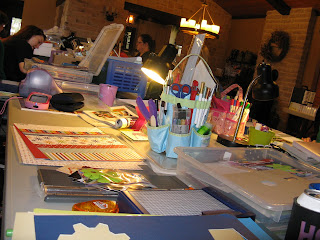
Okay, after you have printed all your photos, you spread out all your files. I only showed the white files for aesthetic purposes, but you can use cardboard! I needed more that you see here, so I did use cardboard!

Next, you take your photos and lay them on the white files. I organize mine by date and event of photos taken. Sometimes I may only need one layout for an event. Other times, I may have too many photos for one layout, so I might have to sort 2 or 3 layouts within one event.

After I sort all my photos, I look for ideas! I have several magazines and magazine pages ripped out and put in binders. Sometimes I can look at my photos and know exactly what I want to do. Other times, I have no idea and I need some guidance. This is where I store the guidance! Sometimes I use just a magazine, other times I pull out random pages from the binders. This time I used a magazine and got lots of ideas from it!

Once I have an idea, I pick out my paper, cardstock, and embellishments that I want to use on my layout. I include it all on top of the file and then stick it into the box. This layout will be for my niece's birthday party. I am using the bottom layout picture from the magazine for my guidance. You can see I included some flowers, ribbon and letters for the title. I use snack size baggies to hold small things. If you just place them on top the file, they will fall off and down into the box. Not good, believe me....this is a mistake I learned on my own. When I am ready to scrap, these things are together and ready for me to use! I've made all the decisions already and it keeps me from bringing all my stuff! This is why I get so much done on retreats!
It took me about 6 hours total to power sort all my photos for the retreat! I didn't count how many layouts I will be doing, but I have 3 boxes full of layouts! These pictures are all the photos I have taken from January 2011 to May 2011. I have a lot to accomplish!!!! If I really focus, I should get most of it done! My record for pages done at a retreat was 85! That is 42 and 1/2 layouts!!!!! Hopefully I will accomplish my goal! I want to start scrapping pictures from this summer!!! Especially my trip! I will post pics from the retreat and let you know if I made my goal! Thanks for looking!!!!
 The 2 landscape cards. Those trees were a beating to cut out!!!!! But I like the way they turned out!
 I love the simplicity of this one! The paper really worked well with each other!
 I loved the star stamp! It was the main reason I bought the set! These were easy to make as well! Using my circle punches really added something!
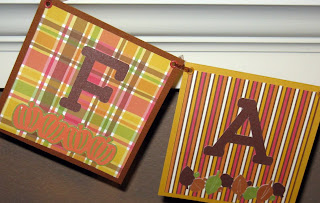
 These are the close-ups! I really do like this hanging on our mantle! After taking down the Halloween decorations, the area looked so bare! I don't believe in Christmas decorations until after Thanksgiving so this was the perfect addition until then!!!!!