Wednesday, February 15, 2012

Retreat Layout-as promised

I went on my retreat this past weekend and had a blast!!!!! I got 24 layouts done! That's 48 pages people! Not my best, but I had some issues this time! My Cricut and Gypsy were giving me fits, so I spent the majority of my time trying to fix them!

I wanted to spend the next few posts on some of the layouts that I did. I really liked how one of my first layouts of the 1st night turned out.

I used a Christmas paper actually for the patterned background, lime green and maroon cardstock for matting and title. FancyPantsDesign tag with an added button for my journal tag. Family Frenzy was cut using Storybook Cartridge. I used magic mesh to accentuate the title.

I really like the pics the best....these were all pictures from our family reunion this past summer. We had such a great time!

Thanks for looking!

Thursday, February 9, 2012

Retreat Cuts Part Deux!

Here is the other cut I made for the Retreat Cut Swap! I can not wait to see what everyone else did as well!!!
I used the Gypsy Font cartridge. Cut out on white paper, pulled it through my Xyron to make it a sticker and covered it with glitter (of course!). I added the rhinestone for super glitz!

I am super excited about my retreat this weekend and I plan to post some great layout shots! Thanks for looking!

Tuesday, February 7, 2012

Retreat cuts

Hello! I am going on a retreat this weekend to scrapbook and I am participating in a Cricut cut swap! Each person picks 2 cuts to cut and then cuts enough for the people participating. By the time the swap is over you have all new cuts done for you! Love it! I chose this cute bird from the Gypsy Wanderings cut on my Gypsy.
Of course I decorated it with glitter! You know how much I love it! I used white cardstock, the Gypsy cart and then green glitter! Super cute!

I will post my other cut later this week! Thanks for looking!

Friday, February 3, 2012

I promise....I have been busy!

Let me start off to say...I have been super busy...busy crafting!!!!! I have done so much these past couple of weeks! Some of it I had to be secretive though about!

First, I made this adorable wreath for our mantle for Valentine's Day! My friend had a craft night at her house, and although I had to miss it, she still gave me the flowers to create this cute wreath!!!


Here is the closeup!
It was super easy to make! My friend cut out the flowers using the Close to My Heart Cricut cart. The cuts started out flat...they looked like spirals. You then wound the spiral around a stick and take it off and voila! You have a flower! I then hot glued them to the base of the spiral, then hot glued them to just a basic twig wreath, stuck a bow and there you have it! Super cute wreath!

These next items I had created back earlier in January, but I couldn't show them! They were for a friend's daughter's wedding shower! Not that she might look at my blog, but I didn't want to risk it! I am so excited I can share now!

This is the card I made for the bride to be!!!! I used my new Texture Boutique to emboss the card, the brown flower was a left over cut I had saved (cartridge not sure). The cake is actually a stamp on patterned paper. The stamp is from Stamps of Life by Stephanie Barnard. If you have not checked her out, you must! I love, love, love her stamps!!! Can't you see why?


The next 2 pics were a recipe box I made for the bride. I was commissioned from the mother of the bride (my friend) to create a box to hold some recipe cards for the bride from all sorts of people at church, family, etc. She picked out the paper, but then left the creativity to me!


The sides are decorated as well with more paper, ribbon and daisies. I used paper from Hobby Lobby and DCWV stacks. I just cut the paper, mod podged them to the box and added the daisies and kitchen sayings. I had a blast making it and plan to make others!

This last pic is of the gift I gave the bride to be! I got this idea on Pinterest.
I created this "cake" using washcloths, wooden spoons, spatulas, a whisk and measuring spoons. These were all things that I just seemed to run out of right away in my own kitchen or that I needed more of when we got married. I used rubber bands to keep the washcloths rolled up, used yarn to keep the rolled up washcloths all together in the layers, and then added pretty ribbon to showcase the "cake." This was so much fun to make!

So, I am keeping true to my promise and goals! I am crafting more, I just couldn't share what I had crafted just yet! I have a retreat to go to next weekend and I am only working on my book from our Colorado vacation. I should finish it! I can't wait to show off the pics! If you are new to my blog, check out my post on organizing for a retreat (Power Layouts). That is what I will be doing this weekend to get ready for the next! Wish me luck!

Monday, January 16, 2012

2012-More scrappin and more updatin!


I had promised to scrap what I had done over the Christmas break back in November. I did do some scrapping during the break, but I did not blog it! I have to got to get more focused! One of my "resolutions" this year is to Scrap more and also to blog it all! Keep me to it people!!!

The Image above was made with my Cricut Imagine! It was the first printed item I've made! I wanted something for our New Year's Eve party, so I made this to hang on the mantle! It was super easy to make! I only used the Imagine, white cardstock, black cardstock, notes eyelets and black ribbon! The font was Designer calendar.

Over the break I started working on my summer vacation book. We took a trip to Colorado this summer for a family reunion and had a blast! I took so many pics, I decided to just make a whole book of it!
I used Paper Studio Vacation stack and Summer Vacation Cartridge. Brown tag and blue brads.

I used the Mosaic Moments Grid paper to lay out the pics and make the cuts. I also used green cardstock and title was made by Jolee's.

I used a paper from a stack I've had for ages...not sure the company. The title was made using Cuttin' Up cartridge and snow flake using the Joys of the Season Cartridge. I made the border with a snowman border from Queen's and Co and embellished it with blue and clear rhinestones.

I also got a new toy! I got a Sizzix Texture Boutique Machine to do embossing. I wanted to add some depth to my cards, so this should do the trick. I also got some new stamps from the Stamps of Life by Stephanie Barnard. If you haven't seen her stamps, you should go to her website and check it out! http://www.stephaniebarnardstamps.com/index.htm. I love her stamps and she puts out a lot of neat videos too! Check it out!
This card was just blue cardstock I had laying around. The I used the Stamps of Life Stars4U stamp set and guava ink. Super easy, but super cute!!!!

Like I said before, I have a goal to keep up with this! Keep me to it! I hope you enjoyed my latest creations! Thanks for looking!

Tuesday, November 22, 2011

Whoo Hoo! Christmas Cards done!

Well, I actually did it! I had a goal of making my Christmas cards during my Thanksgiving Break and I accomplished it! Yes! Now all I have to do is sign them, address the envelopes and send them out! I may actually get them out before the 1st! Usually I don't send them in time to get there by Christmas!

I used a paper set I found at Hobby Lobby called Magic of the Season by PaperStudio. It was an 8 1/2 by 11 inch paper set and although I usually steer away from that size, I really liked the black, cream and red for my cards this year! (I normally get 12 by 12 so I can use the leftovers for scrapbooking!!!)

I used a stamp set called Christmas Love from Close to My Heart stamps. One of my good friends sells Close to My Heart and when I saw this set in the Catalog I knew it would match perfectly with the paper!

The embellishments were things I had lying around. Most of which I got a Scrapbook Convention this last summer. I am definitely stocking up on rhinestones again next year! They have added so much to my paper crafts! And...best part of all? Most of them were just a $1! Love convention!!!

The 2 landscape cards. Those trees were a beating to cut out!!!!! But I like the way they turned out!

I love the simplicity of this one! The paper really worked well with each other!


I loved the star stamp! It was the main reason I bought the set! These were easy to make as well! Using my circle punches really added something!


I can not wait to send these out! I am really proud of how they turned out! Hope you enjoyed them as well!

Saturday, November 12, 2011

Okay....I admit...this is harder to do than I thought!

Keeping a blog updated while you are working is really hard! Of course, it could just be that teaching has really got me busy this year!!!! Many challenges with budget cuts in our district and state are causing me much more work! But...I digress. That information could be a whole other blog!


I have not been working on scrapping as much as I would like! I did however get some inspiration last weekend!!! My husband and I were out at Barnes and Noble and I picked up on of the Cricut magazines. Saw a cute Fall sign to make, so I had to try it myself! I changed it a bit, but used almost all the same Cartridges.


I used brown and yellow cardstock from DCWV for the background squares. The pattern paper was DCWV Fall stack from 2 or 3 years ago. I then used cardstock scraps to make the pumpkins, apples and leaves. I used a shiny brown cardstock from DCWV for the letters. I used the cricut carts Lyrical Letters for the letters, Doodlecharms for the apples and leaves and Gypsy Wanderings for the pumpkins.


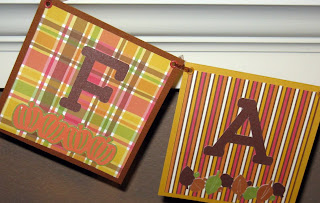
These are the close-ups! I really do like this hanging on our mantle! After taking down the Halloween decorations, the area looked so bare! I don't believe in Christmas decorations until after Thanksgiving so this was the perfect addition until then!!!!!


Hope you liked the newest update! Hopefully I will post something again soon! Thanksgiving break is coming soon (not soon enough!) and I plan to really get some stuff done! Hope to have a lot to post!